Installing a drip irrigation system for flower beds is a great way to save time and money in your garden. Not only does it save water, it also ensures that your plants always get the water they need without having to worry about watering them regularly. Below, tree02.com will provide detailed instructions to help you carry out this DIY project effectively.
Benefits of Drip Irrigation for Flower Beds
Drip irrigation offers several significant benefits for flower beds. First, it enhances water efficiency by delivering water directly to the plant roots, which reduces evaporation and runoff, and minimizes water waste by focusing on the areas that need it most. Additionally, it helps in reducing weed growth, as water is applied precisely where it’s needed, leaving less moisture available for weeds.
The system provides consistent moisture, ensuring a steady supply of water that maintains optimal soil conditions and supports healthy plant growth. Time and labor are also saved with automated systems that can be set on timers, eliminating the need for manual watering and allowing for precise control over watering schedules.
Versatility is another advantage, as drip irrigation can be used in various garden settings, from flower beds to vegetable gardens and containers. Finally, it improves plant health by preventing diseases associated with overhead watering, such as fungal infections, by keeping foliage dry.
Preparation and Planning
Before you begin installing a drip irrigation system, planning is important. There are many different types of accessories and options, so drawing a diagram of your garden or yard will help you visualize how to optimally distribute water. Locate faucets, trees, shrubs, and other green areas on the diagram.
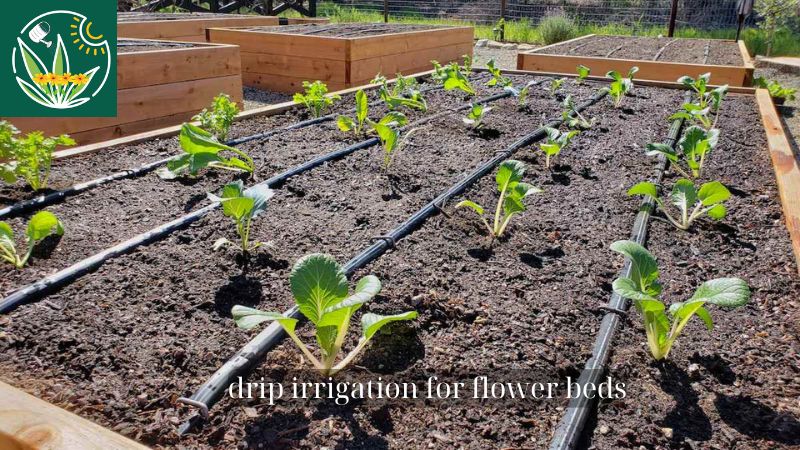
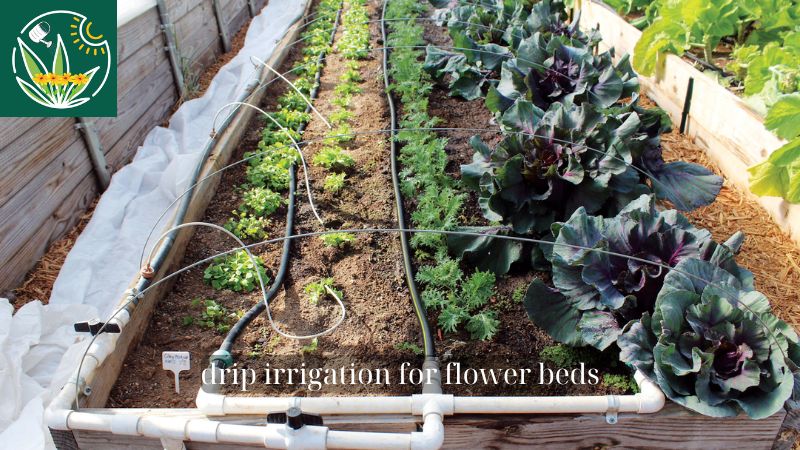
When designing your system, use ½” or ¾” diameter pipe to carry water to the furthest areas of your garden. For my flower beds, I installed a ½” unperforated pipe along the back of each bed, with ¼” micro-pipe connections to carry water to each plant.
If you have plants in raised beds or have many large shrubs, consider using sprinklers, micro-sprinklers, or pipe with spray holes at evenly spaced intervals to ensure even water distribution.
Materials List
To install a drip irrigation system, you will need the following materials:
½” and ¼” tubing: Used to carry water and distribute it to each plant.
Spinning fittings: To connect the tubing together.
Sprinklers and micro-sprayers: To distribute water evenly.
Landscaping stakes and staples: To hold the tubing in place.
Puncher: To make holes in the ½” tubing for the ¼” connectors.
Pruning shears: To cut the tubing as needed.
Timer: To automate the watering process.
Head unit with backflow preventer, pressure regulator, and hose adapter: To protect and regulate water pressure.
Y-coupling: To connect to an outdoor faucet.
Parts organizer: To store the remaining components.
I recommend the Dig brand because of its ease of purchase and high availability at your local store. You can also order online for more convenience.
Drip Irrigation For Flower Beds: Initial Installation
Water Tap Connection
Add a Y-fitting to your outdoor faucet. This allows you to divert water in multiple directions and connect to a drip irrigation system. Make sure both sides of the fitting have levers to adjust the water flow.
Installing Basic Components
To connect the hose to the drip irrigation system, you will need to prepare parts such as an anti-backflow filter, a pressure regulator, and a hose adapter. A timer is also very useful, helping you program the watering time easily.
½” Pipe Installation
Lay ½” pipe along the entire length of the garden bed. Use landscape staples to keep the pipe in place and prevent shifting. For long beds, limit the length of ½” pipe to a maximum of about 200 feet to ensure adequate water pressure.
Add ¼” Tube to Each Tree
Customize your drip system by adding ¼” tubing branches that plug into the ½” pipe. Punch holes with a hole punch and insert the barbed connector into the hole. It is recommended to dip the end of the ¼” tubing in hot water to soften the plastic and ensure a tight connection.
Nozzle Mount
Choose the right type of sprinkler head for your individual plant’s water needs. Adjustable sprinklers are a good choice if you’re unsure about how much water you need, as you can easily adjust the flow of water.
Conclusion
Drip irrigation systems not only save time and effort, but also help your plants grow healthily by providing the correct amount of water. With these detailed instructions, you can easily and effectively install a drip irrigation system for your flower beds.
